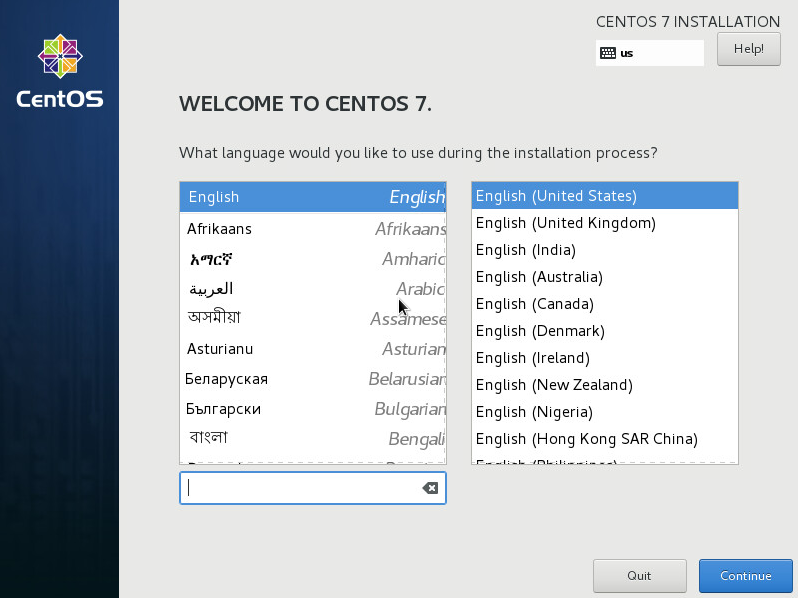
Welcome Screen and Language Selection
The first screen of the installation program is the Welcome to CentOS screen. Here you select the language that Anaconda will use for the rest of the installation. This selection will also become the default for the installated system, unless changed later. In the left panel, select your language of choice, for example English. Then you can select a locale specific to your region in the right panel, for example English (United States).
|
One language is pre-selected by default on top of the list. If network access is configured at this point (for example, if you booted from a network server instead of local media), the pre-selected language will be determined based on automatic location detection using the |
Alternatively, type your preferred language into the search box as shown below.
Once you have made your selection, click the Continue button to proceed to the Installation Summary screen.

After you click the Continue button, the unsupported hardware dialog may appear. This happens if you are using hardware that the kernel does not support.