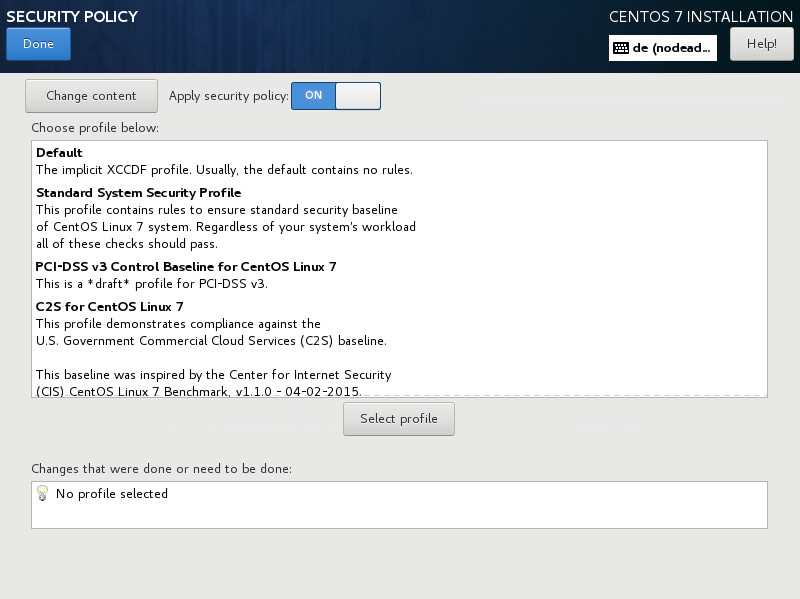
Security Policy
The Security Policy spoke allows you to configure the installed system following restrictions and recommendations (compliance policies) defined by the Security Content Automation Protocol (SCAP) standard. This functionality is provided by an add-on. When enabled, the packages necessary to provide this functionality will automatically be installed. However, by default, no policies are enforced, meaning that no checks are performed during or after installation unless specifically configured.
The Red Hat Enterprise Linux 7 Security Guide provides detailed information about security compliance including background information, practical examples, and additional resources.
|
Applying a security policy is not necessary on all systems. This screen should only be used when a specific policy is mandated by your organization rules or government regulations. |
If you apply a security policy to the system, it will be installed using restrictions and recommendations defined in the selected profile. The openscap-scanner package will also be added to your package selection, providing a preinstalled tool for compliance and vulnerability scanning. After the installation finishes, the system will be automatically scanned to verify compliance. The results of this scan will be saved to the /root/openscap_data directory on the installed system.
Pre-defined policies which are available in this screen are provided by SCAP Security Guide. See the OpenSCAP Portal for links to detailed information about each available profile.
You can also load additional profiles from an HTTP, HTTPS or FTP server.

To configure the use of security policies on the system, first enable configuration by setting the Apply security policy switch to ON. If the switch is in the OFF position, controls in the rest of this screen have no effect.
After enabling security policy configuration using the switch, select one of the profiles listed in the top window of the screen, and click the Select profile below. When a profile is selected, a green check mark will appear on the right side, and the bottom field will display whether any changes will be made before beginning the installation.
|
None of the profiles available by default perform any changes before the installation begins. However, loading a custom profile as described below can require some pre-installation actions. |
To use a custom profile, click the Change content button in the top left corner. This will open another screen where you can enter an URL of a valid security content. To go back to the default security content selection screen, click Use SCAP Security Guide in the top left corner.
Custom profiles can be loaded from an HTTP, HTTPS or FTP server. Use the full address of the content, including the protocol (such as http://). A network connection must be active (enabled in Network & Hostname (x86)) before you can load a custom profile. The content type will be detected automatically by the installer.
After you select a profile, or if you want to leave the screen, click Done in the top left corner to return to The Installation Summary Screen (x86).