The Configuration Menu and Progress Screen
Once you click Begin Installation at the Installation Summary screen, the progress screen appears. CentOS reports the installation progress on the screen as it writes the selected packages to your system.
For your reference, a complete log of your installation can be found in the /var/log/anaconda/anaconda.packaging.log file, once you reboot your system.
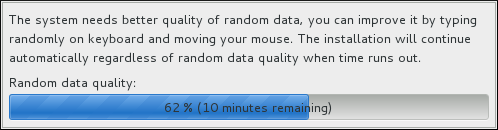
If you chose to encrypt one or more partitions during partitioning setup, a dialog window with a progress bar will be displayed during the early stage of the installation process. This window informs that the installer is attempting to gather enough entropy (random data) to ensure that the encryption is secure. This window will disappear after 256 bits of entropy are gathered, or after 10 minutes. You can speed up the gathering process by moving your mouse or randomly typing on the keyboard. After the window disappears, the installation process will continue.
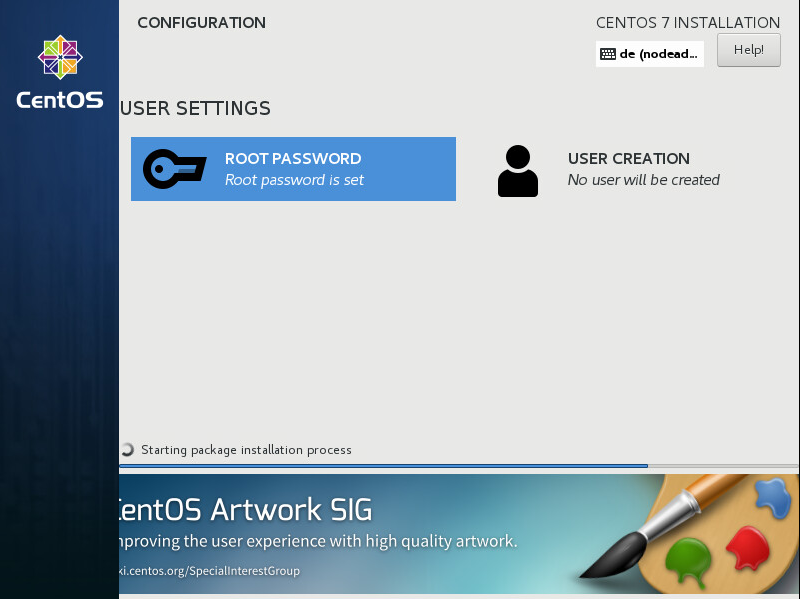
While the packages are being installed, more configuration is required. Above the installation progress bar are the Root Password and User Creation menu items.
The Root Password screen is used to configure the system’s root account. This account can be used to perform critical system management and administration tasks. The same tasks can also be performed with a user account with the wheel group membership; if such an user account is created during installation, setting up a root password is not mandatory.
Creating a user account is optional and can be done after installation, but it is recommended to do it on this screen. A user account is used for normal work and to access the system. Best practice suggests that you always access the system through a user account, not the root account.
It is possible to disable access to the Root Password or Create User screens. To do so, use a Kickstart file which includes the rootpw --lock or user --lock commands. See Kickstart Commands and Options for more information these commands.