Installing in the Graphical User Interface
The graphical installation interface is the preferred method of manually installing CentOS. It allows you full control over all available settings, including custom partitioning and advanced storage configuration, and it is also localized to many languages other than English, allowing you to perform the entire installation in a different language. The graphical mode is used by default when you boot the system from local media (a CD, DVD or a USB flash drive).
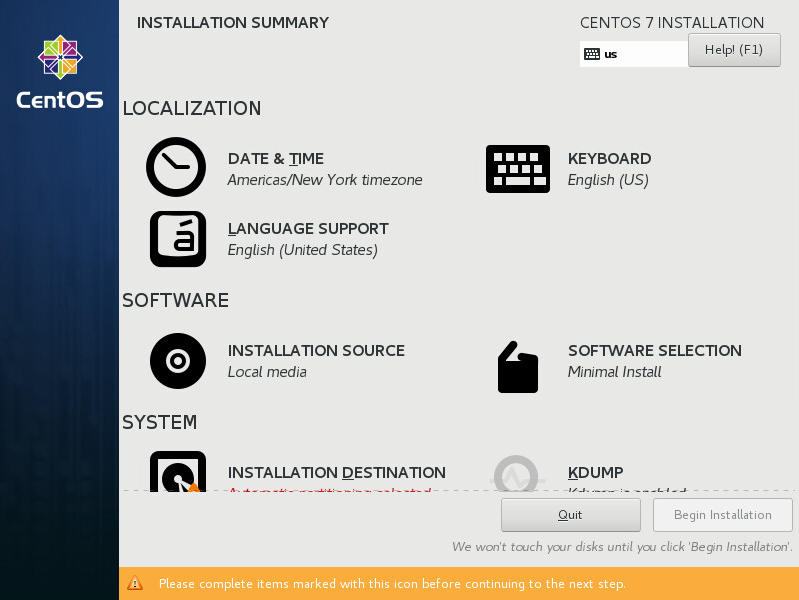
Installation Summary ScreenThe sections below discuss each screen available in the installation process. Note that due to the installer’s parallel nature, most of the screens do not have to be completed in the order in which they are described here.
Each screen in the graphical interface contains a Help button. This button opens the Yelp help browser displaying the section of the CentOS Installation Guide relevant to the current screen.
You can also control the graphical installer with your keyboard. Following table shows you the shortcuts you can use.
| Shortcut keys | Usage |
|---|---|
Tab and Shift+Tab |
Cycle through active control elements (buttons, check boxes, and so on.) on the current screen |
Up and Down |
Scroll through lists |
Left and Right |
Scroll through horizontal toolbars and table entries |
Space and Enter |
Select or remove a highlighted item from selection and expand and collapse drop-down menus |
Additionally, elements in each screen can be toggled using their respective shortcuts. These shortcuts are highlighted (underlined) when you hold down the Alt key; to toggle that element, press Alt+X, where X is the highlighted letter.
Your current keyboard layout is displayed in the top right hand corner. Only one layout is configured by default; if you configure more than layout in the Keyboard Layout screen (Keyboard Configuration (ppc)), you can switch between them by clicking the layout indicator.